
How to Install a Blogger Template

Ruangngoprek.web.id - How to Install a Blogger Template, Hello ngopimedia friends, on this occasion ngopimedia would like to share about how to install a blogger template, of course many of you in the internet marketing world are already familiar with Blogs or Bloggers. Blogs themselves are online media that are widely used by bloggers to write down their thoughts, some also make blogging as an income, yes, blogging can be used as a medium of income if pursued seriously, which later if the blog we create has a lot of visitors or visitors then we can register it with Google Adsense, in Google Adsense this is where bloggers earn income.
So, before earning income, bloggers usually beautify the appearance of their blogs by changing their blog templates, either with premium templates or free templates.
We cover two types of installation methods with step by step guides.
Method-1: Uploading .xml file. Your existing widget will remain in blogger and you will have to delete it manually with this method.
Method 2: Copy and Paste the code. Completely replace all the code. (If you encounter any errors while uploading the template using method 1, try method 2)
So, this time, Ngopi Media will write about how to install a Blogger template.
1. First, we will go to method-1 which is uploading the .xml file. Downloading Blogger Templates. Browse blogger templates in our most popular categories such as Responsive, SEO Ready, Magazine, Simple, Clean, Portfolio, and Fashion. (You can Live Preview each of our templates to see how your blog will look after uploading the template.) After browsing, click the Download button on the template you want and the template file will be immediately downloaded and saved on your computer's hard drive. , can be downloaded from our Blogger template collection HERE
Step 2: Extract the downloaded zip template file.
The file you downloaded is in .ZIP format. We can only upload files with the .xml extension. Therefore, it will need to be extracted. Please extract/unzip.

Step 3: Login to your Blogger Dashboard.
You must login your google account to access your blogger dashboard (Ignore this step if you are already logged in)

Step 4: Access the Themes Section.
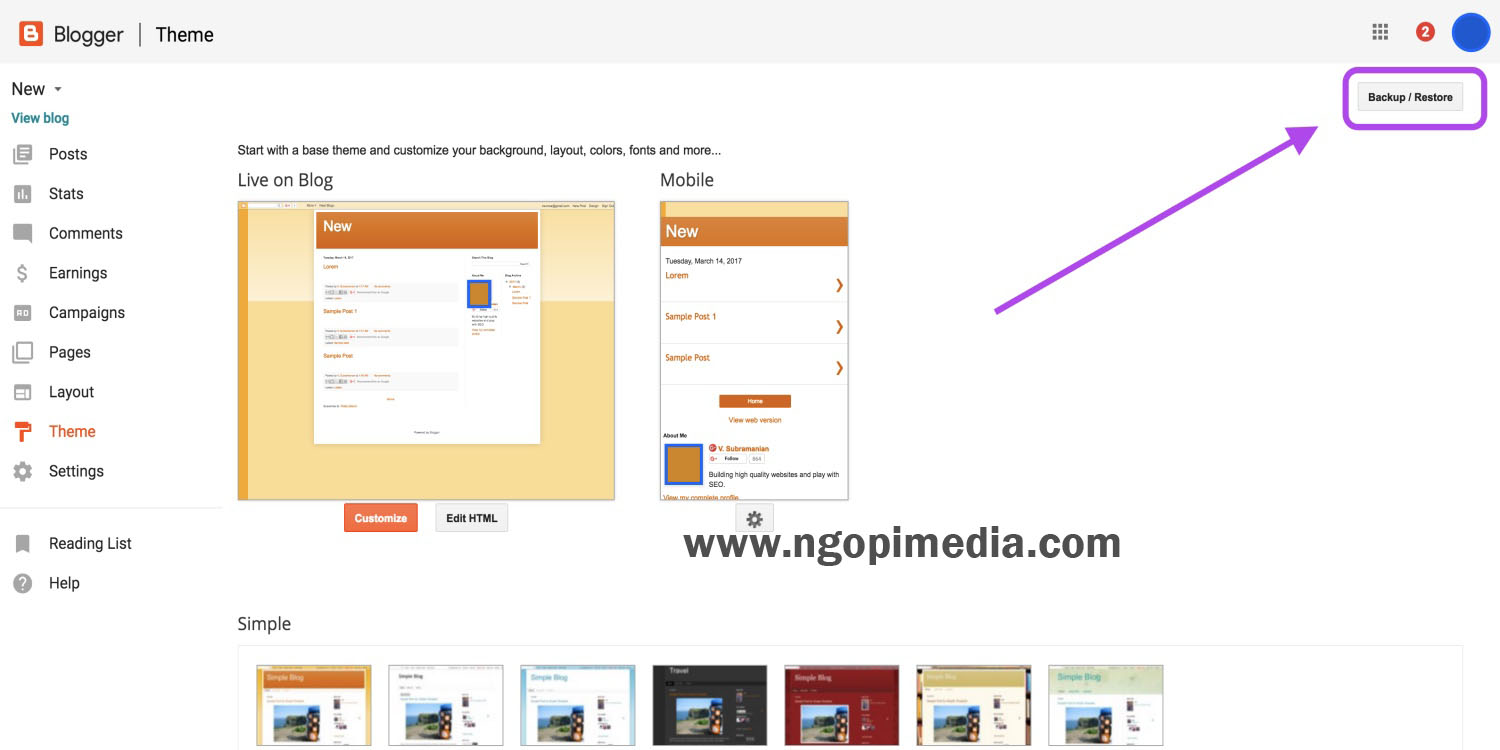
Select (If you have multiple blogs) the Blog in your Dashboard that you want to change the template for, and click "Themes" in the options panel on the left.

Step 5: Access Backup/Restore.
Look at the top right corner, you will see the “Backup / Restore” button and click it.
Step 6: Get ready to upload.
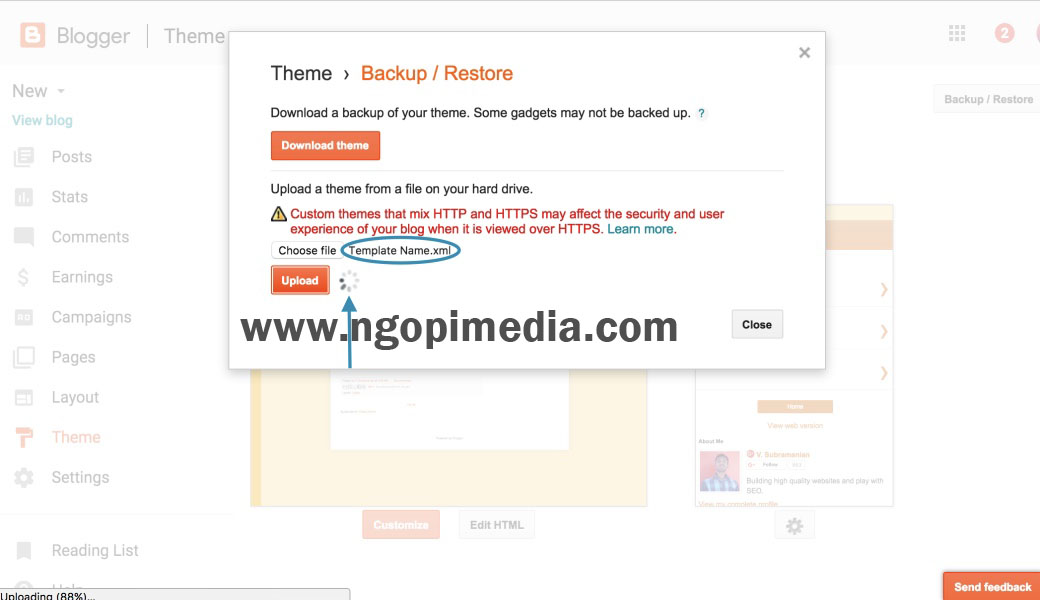
Manage in the pop-up window and click the "select file" button and locate the folder created after extracting the files you have downloaded.

Step 7: select the .xml file to upload.
The folder has .XML files, .TXT files, Internet shortcuts, etc., you should select only .XML files.

Step 8: Start uploading the template.
Click the "Upload" button. The upload process will now appear on your screen.
Now the template will appear on your blog successfully.
So, Ngopi Media friends, that was the article on "HOW TO INSTALL A BLOGGER TEMPLATE." I hope it was helpful. If this article is helpful, don't forget to share it on your social media.

Post a Comment for "How to Install a Blogger Template"